We arrived in Clovis at PPC Customs shortly after the shop opened. Shane and Richard wasted no time hoisting Joe's Elco up into the air and gutting the rear suspension, which looked like it had gone untouched since Nixon resigned.
The car originally came equipped with factory air shocks. The air dampers were still intact, although the original steel air lines were not. The spiders seemed to particularly enjoy nesting here.
Our goal for the rear suspension was a lofty one: lower the car just one inch while still improving the ride quality and handling. These lower control arms from McGaughy's solved several problems, including replacing severely worn out factory rubber bushings.
As much as we dig air shocks, we knew that these gas-charged dampers from Belltech would yield better conrol over the El Camino's suspension.
Although our new coil springs look much shorter than the stockers, they will still only lower the car one inch, thanks to a more aggressive spring rate.
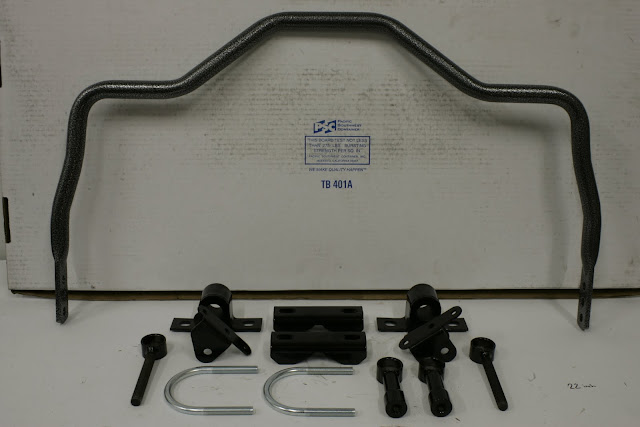
We opted to add a beefy anti-sway bar from Hellwig to help keep the Elco flat in the corners.
Although we had not intended to do any resto work to the car during our brief visit to PPC Customs, we all agreed that installing fresh new parts onto the rusty chassis was like putting lipstick on a pig. Pride simply wouldn't allow the car to leave the shop without a thorough cleaning. So, out came the 10-bolt axle and off to the do-it-yo-damn-self carwash we went!
Once we degreased the rearend and rear of the chassis using KBS Coatings Aqua Clean, we painted everything satin black. The new parts looked right at home once the car was clean. Take a look at McGaughy's adjustable upper control arms. These will allow us to lower the car and adjust the rear pinion angle for max traction and proper alignment of the driveline.
Hellwig's anti-sway bar attached to the axle using u-bolts and another set of brackets attached to the chassis using existing holes. Its a pretty slick arrangement and was super easy to install.
Here's a look at the completed rear suspension. The rearend is still rockin' the factor drum brakes, which suck balls. We'll address that nuisance later on. For now, enjoy the visual of a clean rear suspension and fat BFG tires!
Next time, we'll check out the front suspension mods, new wheels, and then give you the money shot: the car rolling again!
-Mike


No comments:
Post a Comment